Homemade Gluten-Free Bread That Slices Thin & Tastes Amazing: Your Guide to Tender, High-Rising Loaves
For anyone navigating the world of gluten-free eating, the quest for a truly satisfying loaf of bread can often feel like a culinary holy grail. Many homemade gluten-free breads suffer from a dense, crumbly texture, or refuse to rise adequately, making them less than ideal for the perfect sandwich. But what if we told you that achieving a truly
tender high rising gluten free sandwich bread – one that rivals its gluten-containing counterparts in texture, flavor, and sliceability – is not only possible but also surprisingly achievable? Prepare to transform your gluten-free kitchen with techniques that yield an incredibly soft, fluffy, and delicious loaf, capable of being sliced unbelievably thin.
Unlocking the Secret to Superior Gluten-Free Texture: The High-Speed Advantage
The primary challenge in gluten-free baking stems from the absence of gluten, the protein network that gives traditional bread its structure, elasticity, and chew. Without it, doughs can be weak, prone to crumbling, and fail to rise properly. However, an innovative technique at the heart of this recipe allows us to brilliantly circumvent this hurdle: intense, high-speed beating of the batter.
When you beat the gluten-free mixture vigorously at high speed for several minutes, you're not just mixing ingredients; you're actively incorporating a significant amount of air into the thick batter. This finely distributed air plays a crucial role, essentially stepping in to provide much of the structure that gluten would typically offer. The result is a lighter, much fluffier loaf, echoing the soft, airy crumb of premium store-bought varieties. This ingenious method is a game-changer for those seeking to
Unlock Fluffy Gluten-Free Bread: High-Speed Beating Secret, leading to a perfectly structured loaf that defies typical gluten-free expectations.
Crafting the Perfect Gluten-Free Batter: A Departure from Tradition
Forget everything you know about traditional yeast doughs; this gluten-free bread batter is in a league of its own. After its high-speed transformation, the batter will present itself as a remarkably smooth, silky, and thick mixture, reminiscent of heavy buttercream icing. This distinctive texture is your first visual cue that you're on the right track.
Unlike the smooth elasticity of gluten-rich dough, this batter will be inherently very sticky. If you rub a small amount between your fingers, you might notice a slight grittiness – this is perfectly normal and a characteristic of the gluten-free flours used. Embrace this unique consistency, as it's precisely what will deliver that soft, moist interior.
Key Batter Management Tips:
*
Precision is Paramount: Gluten-free baking is often more finicky than traditional baking when it comes to measurements. Accuracy is non-negotiable here. Use a spoon to gently scoop your flours into measuring cups, then level them off with the back of a knife. Avoid scooping directly with the measuring cup, as this can compact the flour and lead to an inaccurate measure, throwing off the delicate balance of the recipe.
*
First Rise Expectations: Once mixed, scrape down the sides of your bowl, cover it lightly with a towel or loose plastic wrap, and allow the batter to rise. Don't expect it to double in size like a conventional yeast dough; this
tender high rising gluten free sandwich batter will puff up considerably, gaining volume and becoming noticeably lighter. It will remain wet and impossible to knead, maintaining a consistency similar to a very thick brownie batter. This is normal and exactly what you want.
The Art of Shaping: Achieving a Flawless Loaf
With this delicate gluten-free batter, the path from bowl to loaf pan requires a touch of finesse. The effort you put into smoothing the surface of your loaf before its final rise will directly translate into the appearance of your baked bread. The top of the loaf will look very much the same as it does after you finish smoothing it, so investing a minute or two in this step is well worth it for a professional-looking finish.
Essential Steps for a Beautiful Loaf:
1.
Handle with Care: This dough is quite delicate. Any finger touch, bump, or imperfection will likely be visible on the finished bread. Work gently and purposefully.
2.
Eliminate Air Bubbles: When you transfer the batter into your prepared loaf pan, it's crucial to gently press it down enough to remove any trapped air bubbles. Air pockets within the batter can lead to an unsightly hole in the center of your bread after baking. While this won't impact the taste or overall baking, it can make for an odd sandwich experience. Use a spatula or the back of a moistened spoon to gently smooth the top and press out air, ensuring a consistent, even crumb.
3.
Smooth Operator: Take your time to gently smooth the surface of the batter in the pan. This isn't just for aesthetics; an evenly distributed batter will rise more uniformly.
From Oven to Table: The Final Touches for an Amazing Loaf
After the final rise and baking, your kitchen will be filled with the irresistible aroma of freshly baked bread. But the journey to a perfect loaf isn't quite over. Two simple steps after baking can elevate your bread from good to extraordinary.
*
The Butter Brush: Immediately after removing the bread from the oven, brush the top with a very small amount of melted butter. This simple trick serves a dual purpose: it helps keep the crust beautifully soft and pliable, preventing it from becoming too crisp, and it imparts a subtle, delicious flavor that enhances the overall experience of your
tender high rising gluten free sandwich bread.
*
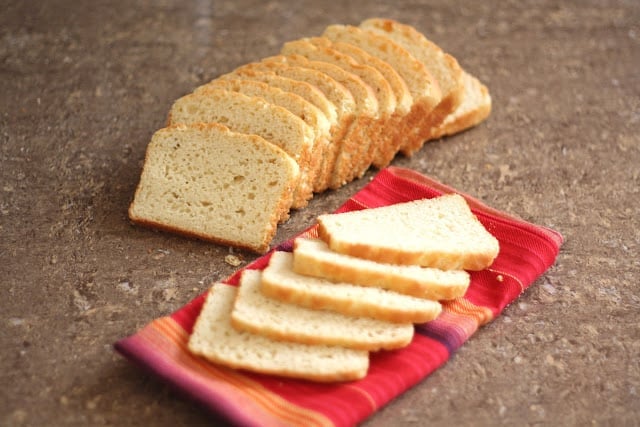
Patience is a Virtue (and Key to Slicing): The most critical step before slicing is allowing the bread to cool *completely*. Attempting to slice a warm gluten-free loaf will almost certainly result in a crumbly mess. As the bread cools, its internal structure sets, allowing for clean, precise slices. This patience pays off handsomely, as you'll discover this bread's incredible ability to be sliced remarkably thin. We've consistently achieved 2-3 slices per inch, yielding approximately 20 slices from an 8 ½-inch loaf pan – a truly impressive feat for homemade gluten-free bread. This incredible sliceability is one of the hallmarks that makes this
Your Guide to Soft & Sliceable Gluten-Free Sandwich Bread truly exceptional.
The versatility of this bread is astounding. Slice it thick for hearty toast with homemade peach jam, perfect for breakfast or a sweet treat. Or, slice it thin for elegant sandwiches at lunch, making it a staple for your family meals. It even toasts beautifully, making it an ideal base for French toast – a delightful dessert or a special weekend breakfast everyone will adore.
Conclusion: Embrace Your Gluten-Free Baking Journey
Baking a truly incredible loaf of gluten-free bread can seem daunting, but with the right techniques and a little patience, you can achieve results that will surprise and delight you. This recipe provides a dependable method for creating a soft, fluffy, perfectly sliceable, and utterly delicious
tender high rising gluten free sandwich bread that truly tastes amazing. By understanding the unique characteristics of gluten-free batters, embracing the power of high-speed mixing, and applying careful handling, you can conquer the common pitfalls and enjoy homemade bread that exceeds all expectations. So, gather your ingredients, follow these proven steps, and prepare to be thrilled with the unparalleled satisfaction of your very own homemade gluten-free masterpiece.